How to Install WSL (Windows Subsystem for Linux)#
This guide explains how to install Linux on Windows.
The WSL (Windows Subsystem for Linux) feature has been built into Windows since Windows 10.
The installation is simple, and you can conveniently use Linux as a virtual environment alongside Windows.
The instructions are based on Windows 11 Home (24H2).
We will install Ubuntu as the Linux distribution.
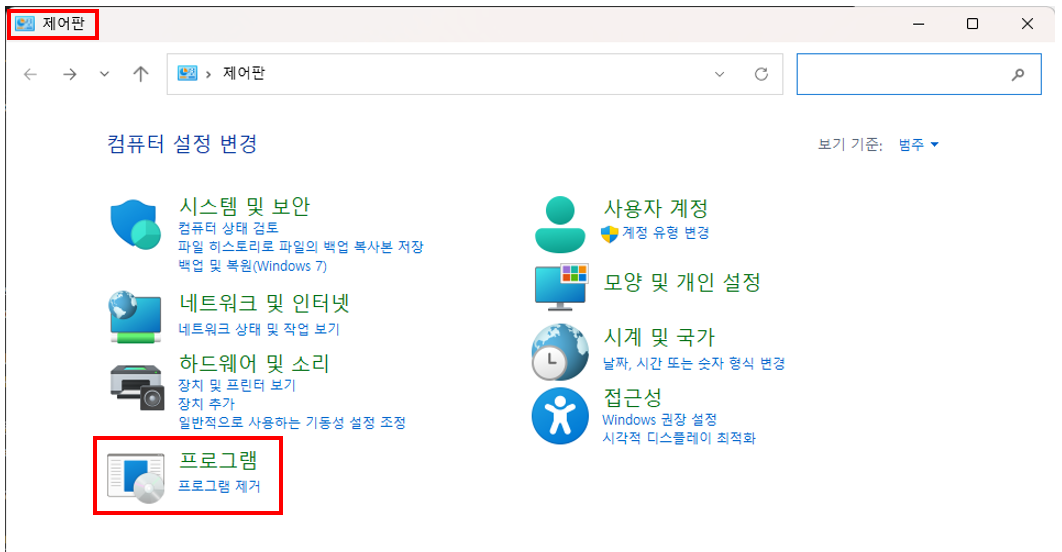
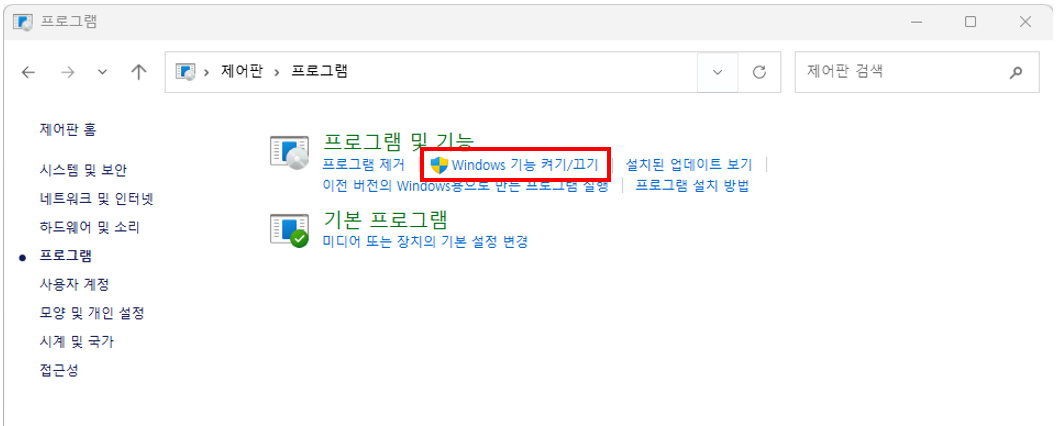
1. Open [Control Panel] -> [Programs] -> [Turn Windows features on or off]#
2. Check “Windows Subsystem for Linux” and “Virtual Machine Platform” -> Confirm -> Reboot#
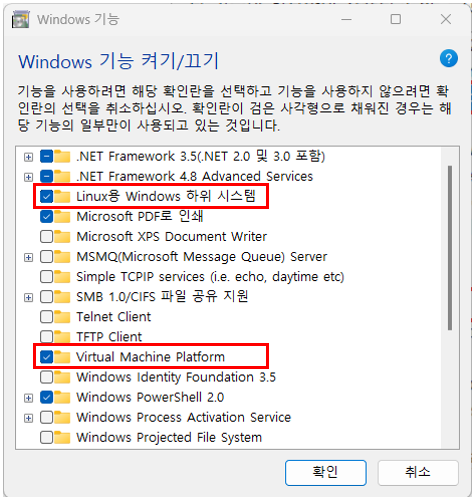
※ Depending on your computer environment, you may also need to check the following items:
“Hyper-V”, “Windows Subsystem for Linux”, “Windows Hypervisor Platform”
3. Download and install Ubuntu from the Microsoft App Store#
- Microsoft App Store :
https://apps.microsoft.com
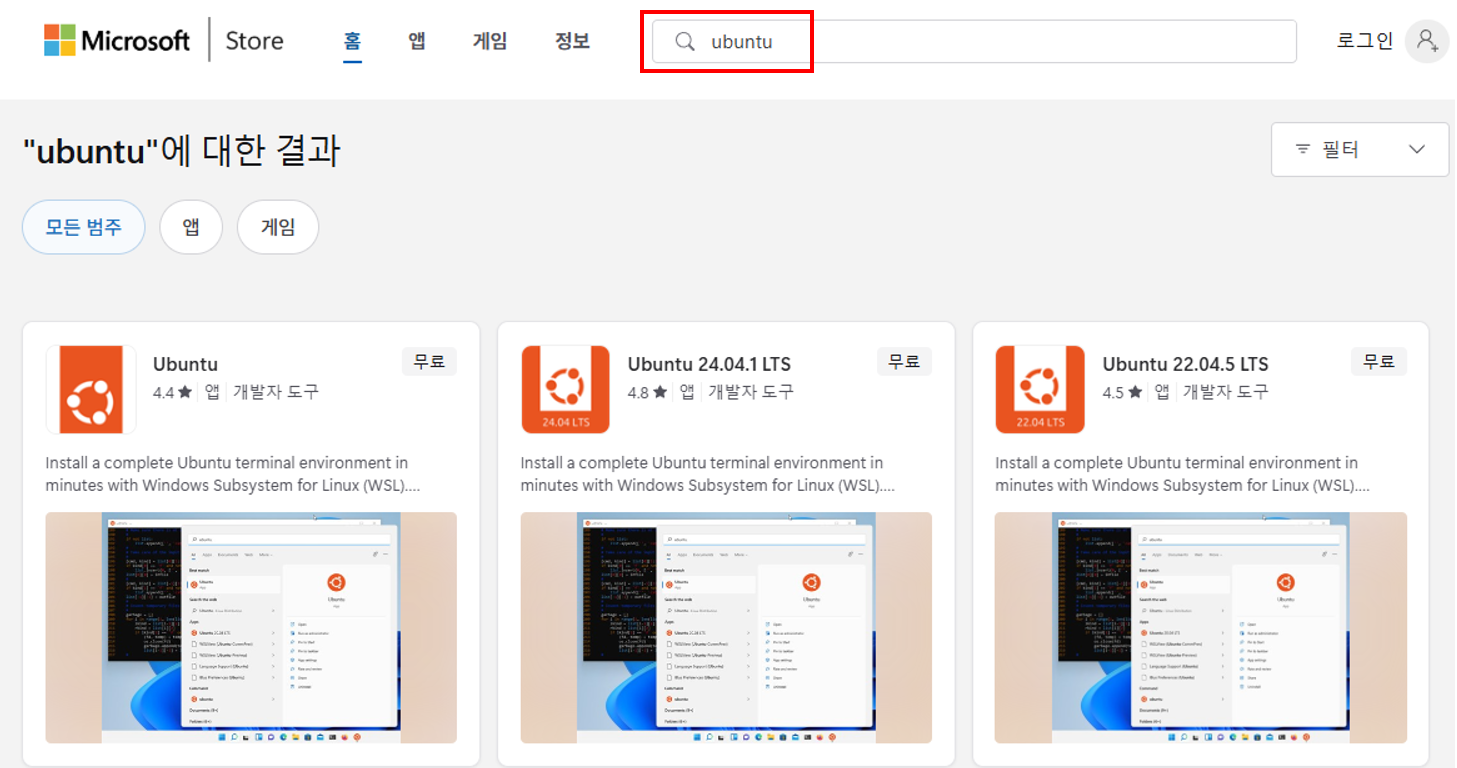
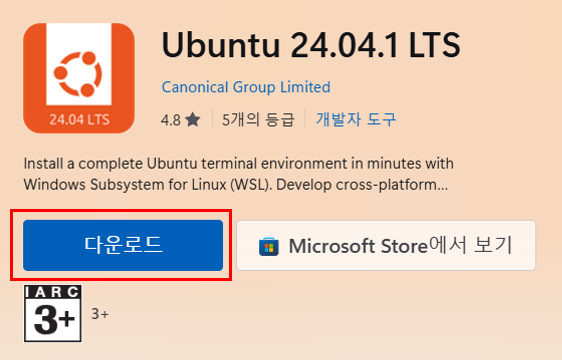
4. Launch the installed Ubuntu from the [Start] menu#
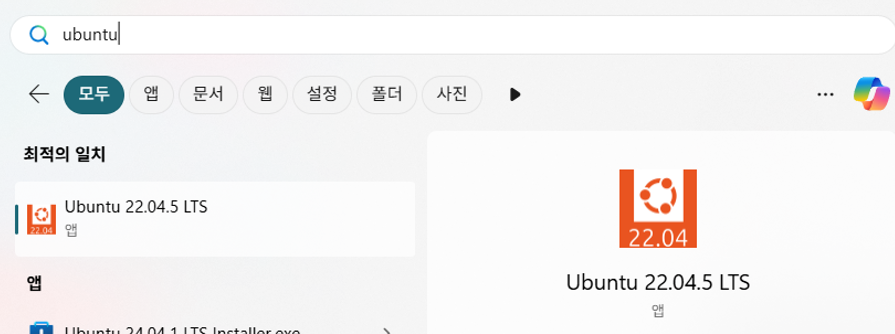
※ When prompted for a password on the first launch, enter the password of your choice.
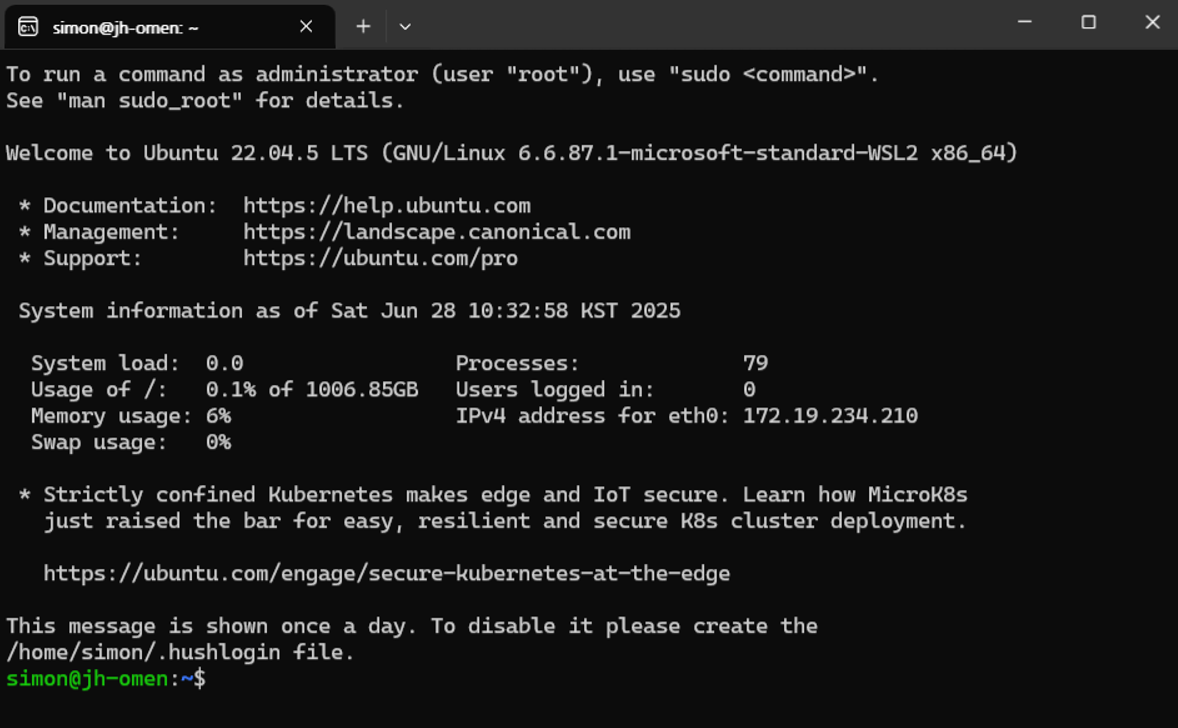
Linux installation on Windows is complete.
How to transfer files to and from Linux#
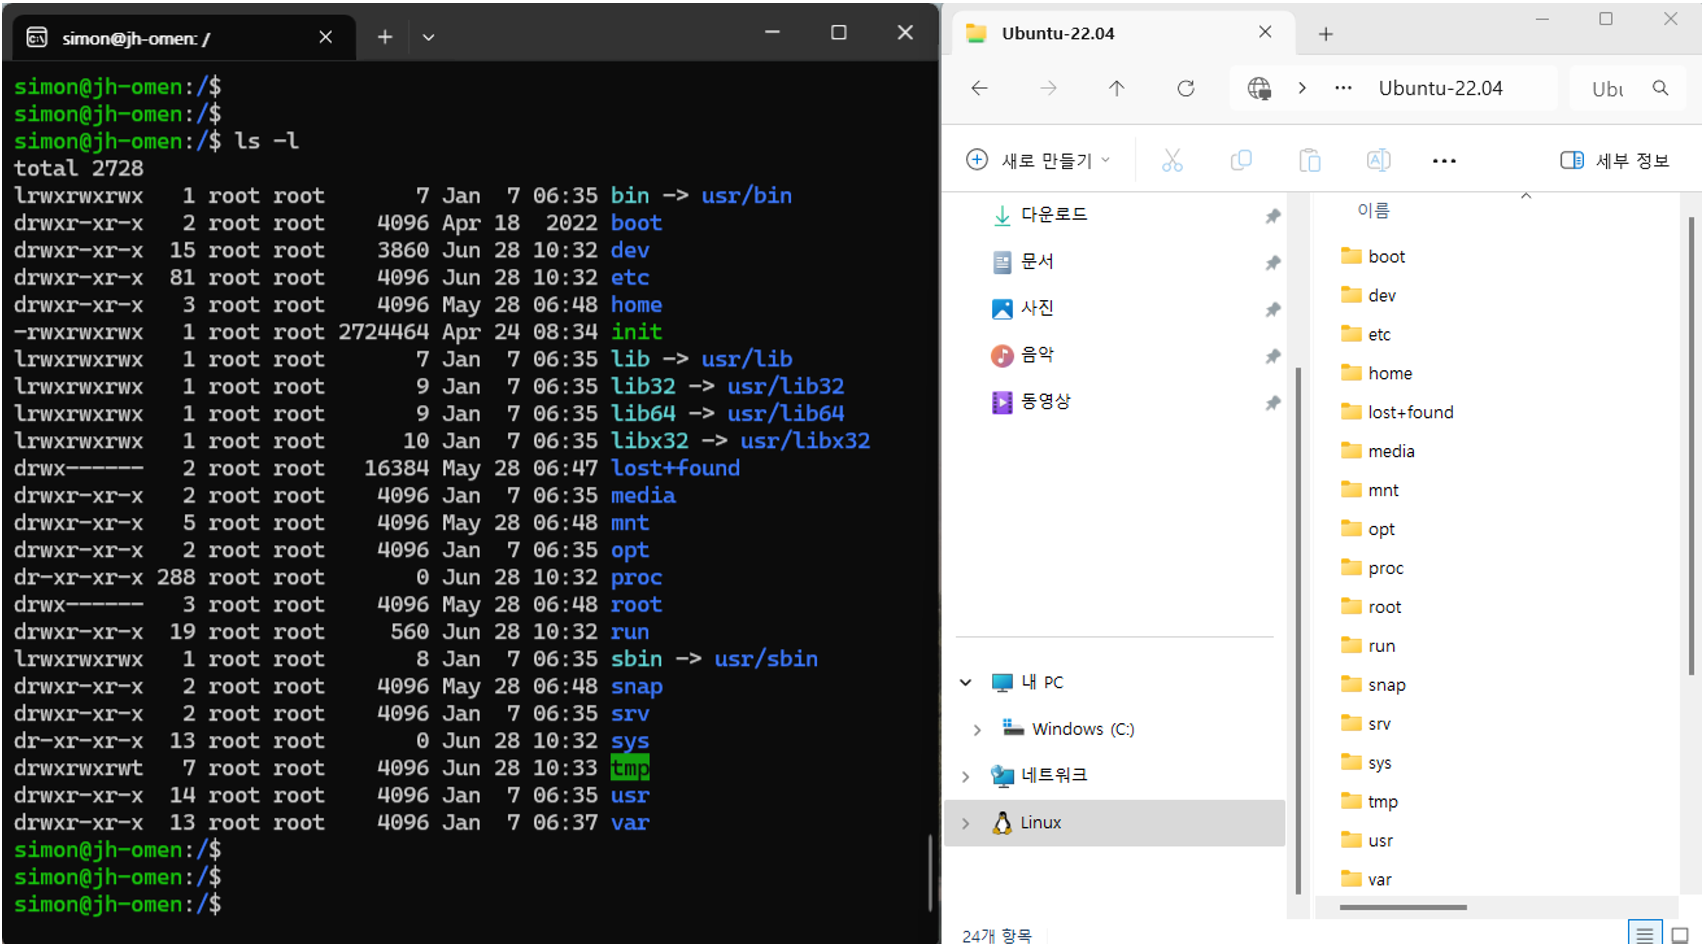
When you open File Explorer, Linux appears as shown below.
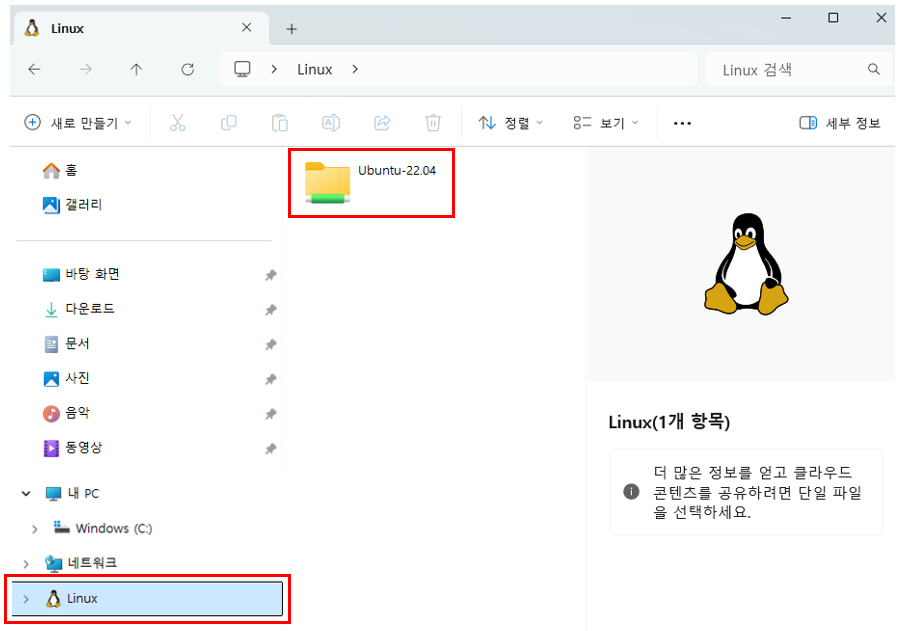
If you navigate into Linux from File Explorer, the Linux file system is visible as-is.
When you paste files via File Explorer, they appear identically in the Linux Shell.
Therefore, you can transfer files in and out by simply using File Explorer.